
After creating the report, click the link to show “Custom Test Report Activity”:

On the main Custom Test Report activity page, wait for your report name to appear on the list and click the filename to open the report:
The file will open in your default text editor. Next, use the keystroke combination “Control+A” to select all text in the file, then use keystroke “Control+C” to copy the text to your computer’s clipboard.
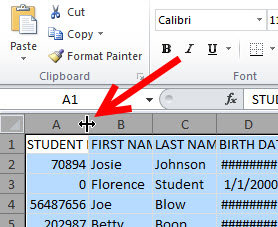
Once the content is copied to the clipboard, open Excel and select cell A1, then use the keystroke combination “Control+V” to paste the content into the spreadsheet. Left-click in the cell above and to the left of A1 to highlight the entire sheet, then double left-click on the border between columns A and B to expand all columns to the appropriate width:
Next, just click on “Home” -> “Sort & Filter” -> “Filter” to set the auto-filtering:

Once this is complete, choose any filtering value you wish. For example, filtering based on grade levels is done by clicking the down-arrow at the top of the appropriate column and then eliminating all undesired grade levels:

Note the report is now filtered appropriately by removing all non-fourth-grade students:
Alternatively, you can sort data within any column by selecting the desired column and using the “Sort & Filter” button selections:

For more information or a quick reference guide on how to create a Custom Test Report, please contact your Field Services Coordinator.
No comments:
Post a Comment